From Zero to Inbox Hero •
Whether Titan Email is part of your hosting plan or you’re using it as a standalone service, getting it up and running on your desktop, laptop, or mobile device is a breeze. Let’s walk through the setup together. There is no fluff; steps that work.
Get Your Credentials
Before you do anything, make sure you’ve got your email address and password ready – the ones assigned to you by our agency’s technical team.
Lost them? No problem. Just head to Tickets, submit a request titled something like “Need Titan Email login info,” and we’ll help you recover your credentials securely.
Web Interface
Titan Email Configuration Details
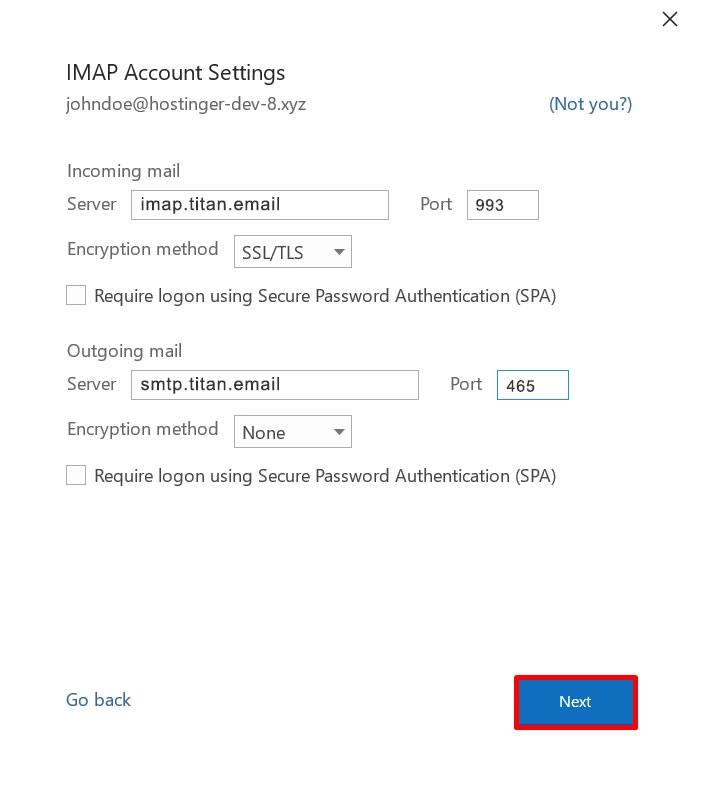
IMAP
Host: imap.titan.email
Encryption: SSL/TLS
Port: 993
POP3
Host: pop.titan.email
Encryption: SSL/TLS
Port: 995
SMTP
Host: smtp.titan.email
Encryption: SSL
Port: 465
Web Access: Use Titan in Your Browser
Want to check your email without installing anything? Here’s how to log in via webmail:
- Open your browser and go to https://app.titan.email/login/.
- Enter your Titan email address and password.
- Click Login.
- You’re in! You can now read and send emails, tweak your settings, and use all the cool features Titan offers right from your browser.
Setup on Android (Titan App)
If you’re on Android, staying connected is easy with the official Titan app:
- Open Google Play, search for Titan for Titan Mail Accounts, and install it.
- Launch the app.
- Enter your Titan email address and password.
- Done – your mailbox is now in your pocket.
Setup on iOS (Titan App)
Using an iPhone or iPad? Titan’s got your back:
- Go to the App Store and install Titan: App for Titan accounts.
- Open the app and log in with your Titan credentials.
Alternatively, if you prefer the native Mail app:
- Go to Settings > Mail > Accounts > Add Account.
- Choose Other.
- Add a Mail account manually.
- Enter your Titan email info and server details (more on that below if needed).
- That’s it – now Titan works with Apple Mail too.
Setup in Microsoft Outlook
Prefer Outlook? Here’s how to hook it up:
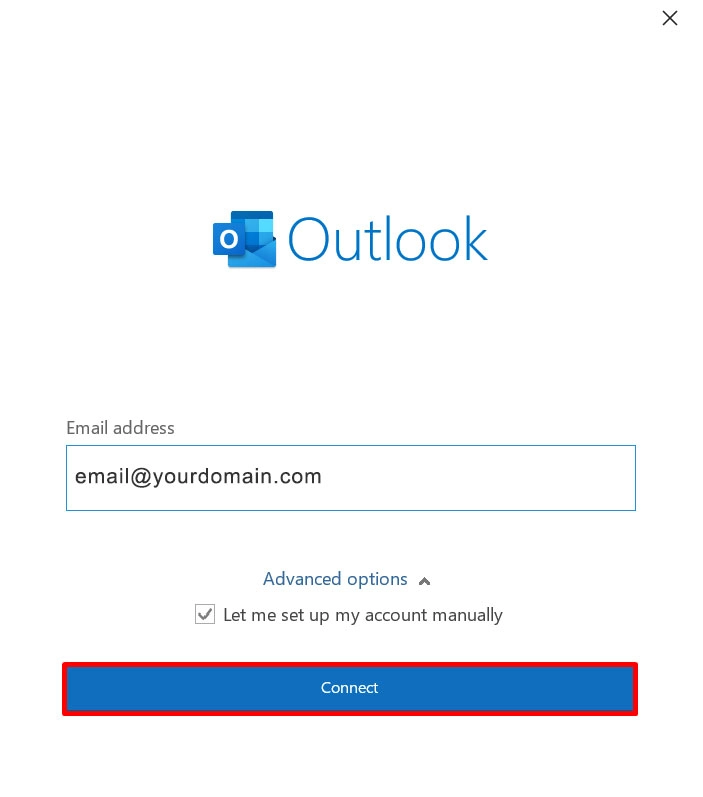
- Open Outlook.
- Enter your Titan email and check Let me set up my account manually.
- Click Connect.
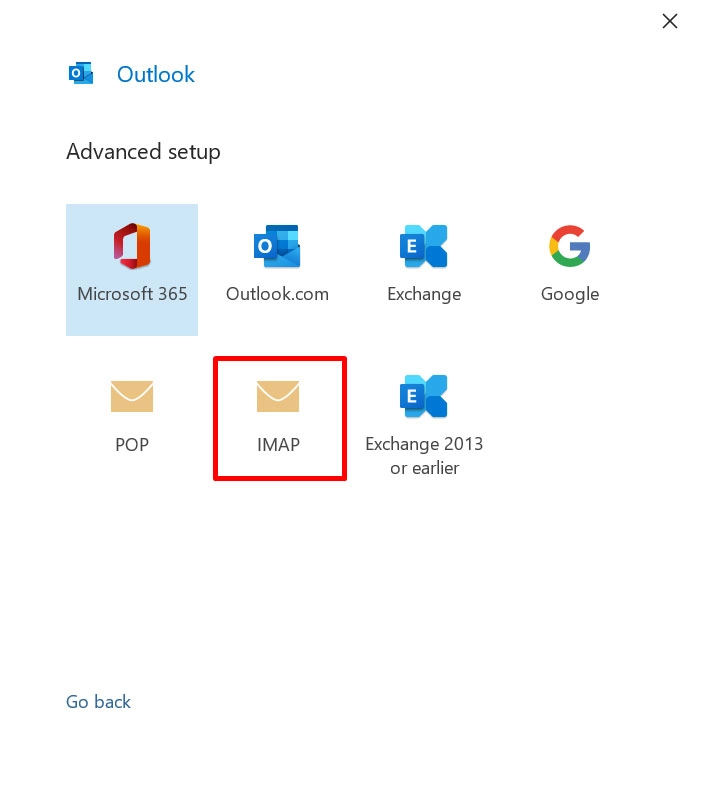
- Choose IMAP (recommended) or POP.
- Use Titan Email configuration details.
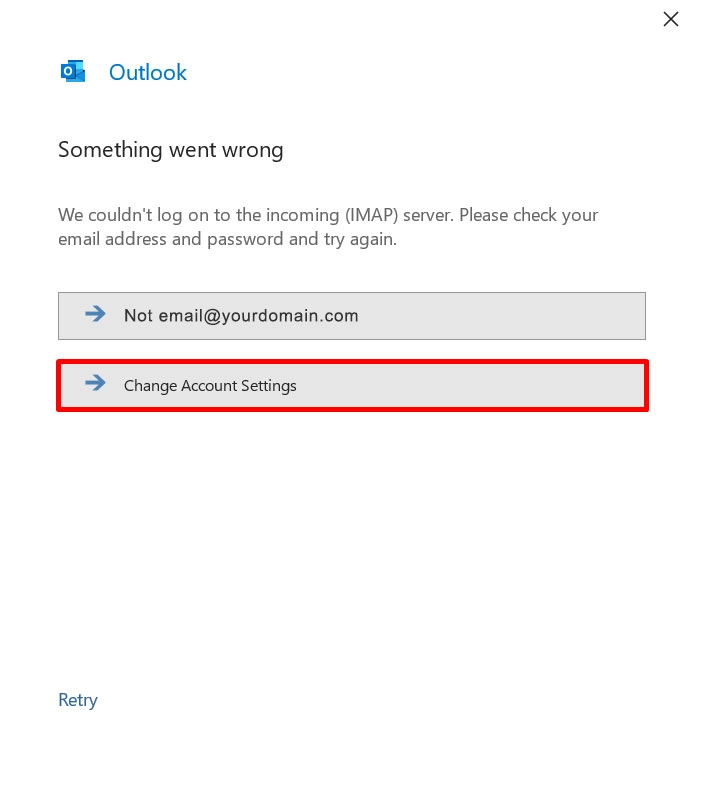
- Enter your password.
- Hit Connect. If it all checks out, click Done.

Heads up: To use a custom email in Outlook, you’ll need an active Microsoft 365 subscription – Business Basic, Standard, or Premium.
Outlook on Android
Want Titan in Outlook on Android? Easy:
- Open the Outlook app.
- Tap Add Account, type your Titan email, and tap Continue.
- Choose IMAP.
- Hit Use Advanced Settings, double-check everything.
- Enter your password.
- You’re good to go.
Outlook on iOS
Setting up Titan Email in Outlook for iPhone/iPad:
- Open Outlook for iOS.
- Enter your email, tap Add Account.
- Fill in name and account description.
- Enter Titan Email configuration details.
- Enter your password.
- Tap Sign In and wait for connection confirmation.
IMAP vs. POP: What’s the Difference?
Both IMAP and POP are email protocols – but they work differently:
- IMAP: Syncs emails with the server. All changes (read, delete, folders) are reflected everywhere. Use this if you check mail from multiple devices.
- POP: Downloads emails to one device and usually deletes them from the server. Good for single-device setups or offline access.
Recommendation: Use IMAP unless you have a specific reason to go POP.
Once you’ve followed the steps for your device, your Titan Email will be up and running. Whether you’re checking mail from your laptop at work or your phone on the go, you’re connected, synced, and in control.
Got stuck? Open a support ticket – our team’s got your back.